10. Photography Mistakes: Closing the Blinds or Curtains
Sunlight is your friend! Since real estate photos are meant to draw people to the property, making sure that the room looks bright and full of sunshine is a great way to do that. Closed curtains or blinds will only make the space feel dark and cold, either because of a lack of light or because it will be full of flash lighting. Open up those curtains or blinds to allow as much natural light in as possible. Shooting midday helps avoid ultra bright light streaking into the room, while having plenty of natural light to fill the space indirectly. If you’re still seeing some bright spots or dark corners, using 2-3 exposures for a slight HDR edit can help to balance those out. If needed, use a flash to fill shadows a bit.
9. Not Educating Your Client on How to Prep a Space for Photos
You are not a magician. If you show up to a property and it’s a complete mess, it will still be a complete mess in the photos. Part of your job as the photographer is to inform your clients of any prep work they should do. If you recommend actions that they choose to not take, like de-cluttering the living room, then you’ve done your job and the home will unfortunately not show as well. It’s best to have your prep suggestions written in a pdf so you can just email it to your client with each shoot appointment. Things that should be included in your prep suggestions include cleaning floors, clearing all counters and tables, making all beds, emptying sink of dirty dishes, clearing refrigerator of most magnets, checking that curtains and blinds are operable, and getting some fresh flowers for pops of color. If you begin working with a real estate agent regularly, they’ll eventually relay the information to the homeowner without you needing to remind them.
8. Crooked Lines
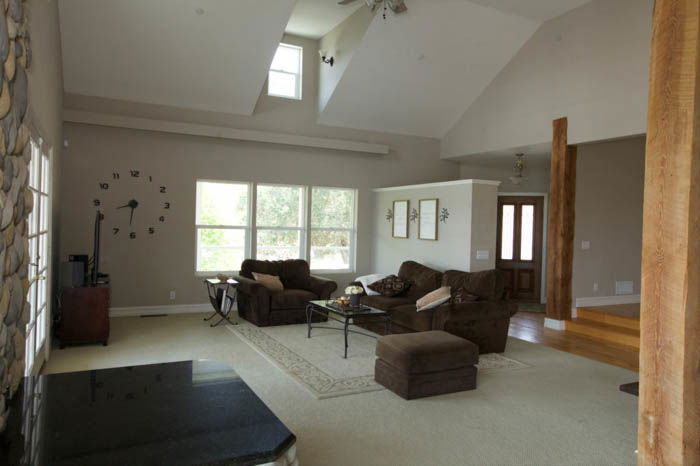
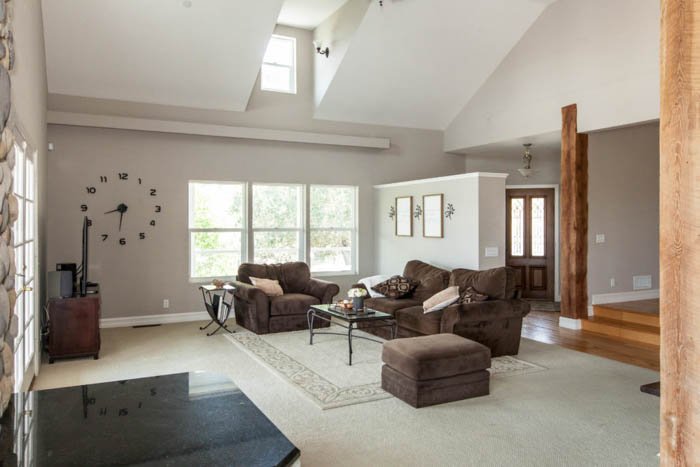
One of the quickest ways to up your real estate photography game is by making sure all your lines are squared off. This means your verticals are vertical and horizontals are horizontal. In Lightroom, you can first use Lens Correction to let it automatically fix any lens distortion, and then use the Transform section just below that to straighten your lines against a grid. For time’s sake, you can use the Auto button to let Lightroom straighten out the lines for you, but oftentimes you’ll still need to tweak the lines to truly have them squared off. To minimise how much straightening you have to do during editing, you’ll want to have your camera held perfectly level. And unless you’re shooting into a corner you’ll also want to be pointing straight at your subject so the horizontals are level, too. Ideal height for interior photography is at about 5in height, and having a tripod helps you take that extra moment to ensure everything is lined up perfectly straight.
7. Varying Light Temps
While I personally recommend shooting with all lights off, there are differing opinions on that. Whatever you decide, be aware of various light temperatures, and be sure to balance them out in your editing. Incandescent lights are much warmer than sunlight, so typically, interior lights are very yellow and sunshine is a bit blue. Using brushes in Lightroom is one quick way to correct the imbalance. Adjust the temperature slider to cancel out whatever color you’re correcting. Blue will cancel out the warm lights, and yellow will cancel out cool blue light. Fluorescent lights may have a green tint to them. Adjusting the brush for a red tint would even that out. If there’s a glow of light from a nearby window or light fixture, the graduated filter can also be a great tool to balance out the temperature seamlessly.
6. Not Having a Property Release
We’ll assume that you have a contract in place because it’s crucial that you have a general contract for each client before working with them. Did you know, though, that you need to have a property release for each and every privately-owned location that you photograph? The release is only needed if you ever want to show the images, like in your social media feeds or on your website. Just to be sure, I recommend always requesting that they sign a release. You just never know if you’ll want to use the image one day down the line. One easy way to handle the property release is to work it into your process. I like to send the property release with the invoice, so the client gets all documents at once. This makes the process more streamlined, and I rarely forget to request that signature!
5. Shooting Without a Shot List
Real estate photography is typically fast-paced. The budgets are low, the clients are in a rush to get the listing into the market, and so time is of the essence. One way to ensure you don’t take more time than needed is to have a general shot list planned out for all real estate photography assignments. While each home may have unique qualities or details, there are standard shots that will apply to all properties. For example, you know you’ll need a wide shot of each bedroom and bathroom. However, you may decide to add an extra wide shot in a bedroom that has more interest in the design. If time permits, you can also consider adding some vignettes or details. Don’t be afraid to start with a very basic shot list, and then add or modify as needed. This is one area where having client feedback can help to create the ideal process for your market.
4. Individually Editing Each Photo
Speaking of keeping the process quick, you’ll want to consider your editing as well. It’s so easy for us to get caught up in each photo, but real estate clients are not typically looking for artistic work. Rather, they need clean, professional photos that clearly show all spaces and entice potential buyers to the property. Real estate photography is the ideal niche for editing in batches. There are several ways you can incorporate this into your workflow. If you have saved your previous edits as presets, you can apply presets to a set of photos while importing. Alternatively, you can edit one photo, then select a group of photos following it, and click on ‘Sync’ to copy the settings to all selected images. While you’ll still want to quickly go through the photos and make sure lens correction, lines, and general edits are to your liking, doing batch editing will save you loads of time!
3. Shooting With Fisheye
When it comes to lenses, some think that ‘wider is better’. While a wide angle lens is needed for most listings, you’ll want to avoid going too wide. Anything wider than 10mm on a cropped sensor camera or 16mm on a full sensor camera starts getting into the classification of fisheye lenses. These ultra-wide lenses have much more distortion, and end up making the space difficult to really see clearly. This degree of distortion also makes it incredibly difficult to straighten out lines and correct lens distortion in your editing. Your pictures will end up looking like amateur snapshots rather than professional photographs. I tend to shoot real estate work between 16-20mm (with a full sensor camera), with 16mm only being used in small spaces out of necessity. As with all recommendations, you’ll want to experiment a bit on your own and find the ideal process for you. Doing a bit of research to see what top work in your area looks like will also give you some perspective on client expectations and things that you do and do not want to emulate.
2. Pointing the Flash Directly Into the Room
Using a flash is sometimes necessary. But pointing a flash directly into the room will almost always give too harsh of a look. Instead, you’ll want to bounce the light off a wall or the ceiling. This helps to diffuse it, softening the harsh “flash look” that it would otherwise have with a bright center and quick drop-off of light towards edges. The simple change of bouncing the flash rather than just pointing it in can completely change the feel of your photos. Be sure to make the flash a bit brighter when you bounce it. The light has to travel farther to fill those shadows!
1. Not Listening to Your Market
Everyone you talk to will have an opinion. It may take some time to learn whom you should listen to more carefully than others. Be sure to do some research before implementing changes. And it never hurts to directly ask your clients what they want to see from you! For real estate photos, you’ll want to look at the MLS (Multiple Listing Service) as a guide. If it allows 25 photos, then your packages should include at least 25 photos so that they can use up all the allowed spots on the listing. There is usually also an ideal photo size requested for uploading. Delivering photos that are already sized for MLS can be a big benefit to your clients. After each shoot, ask your client if they have any feedback for you. This can be something they loved or something that felt lacking. Finally, check in with others in the real estate photography industry every once in a while. This way you’ll see if your rates, packages, and level of work need to be adjusted to stay with current market needs and trends.
Conclusion
Setting out in a new photography niche of any kind takes time and patience as you make mistakes and grow. However, talking to others who have been where you are and have learned from mistakes will help you avoid some pitfalls. As you look at each of the above mistakes to avoid, be sure to also do research and test different things with your clients. That will help you find what works best for you, your clients, and your local market. And soon enough, you’ll be the professional helping out the budding photographers! For more great tips, check out our article on real estate photography pricing!
